How to Set Up Azure as a 3rd-Party IdP for Amazon Connect (From Salesforce Service Cloud Voice)
Published on: 9/2/2025

Default Behavior in Service Cloud Voice
By default, when agents log in to Salesforce and launch the Voice Console (Amazon Connect CCP), Salesforce acts as the IdP. Salesforce sends a SAML request to AWS IAM, which provides the agent access to Amazon Connect.
But what if you want Azure AD to handle this instead of Salesforce? That’s where the 3rd-party IdP configuration comes in.
Step-by-Step Flow
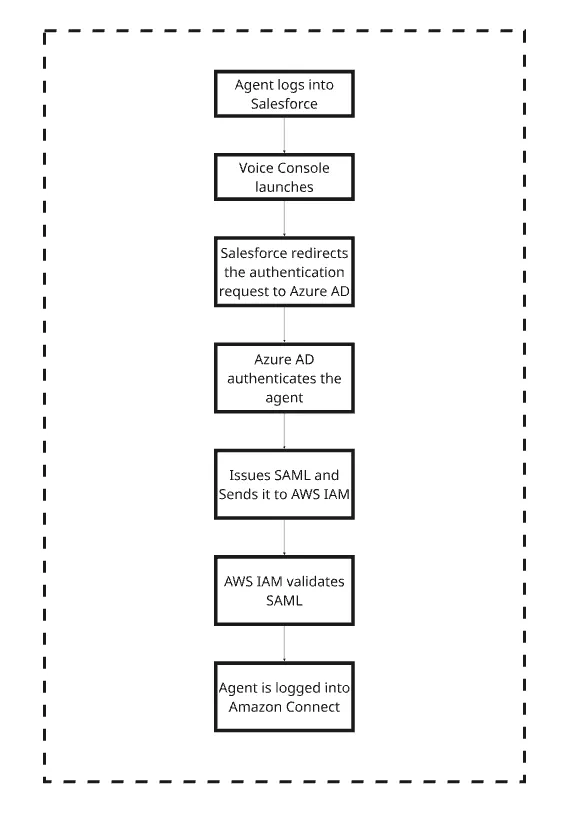
How we set it up step by step
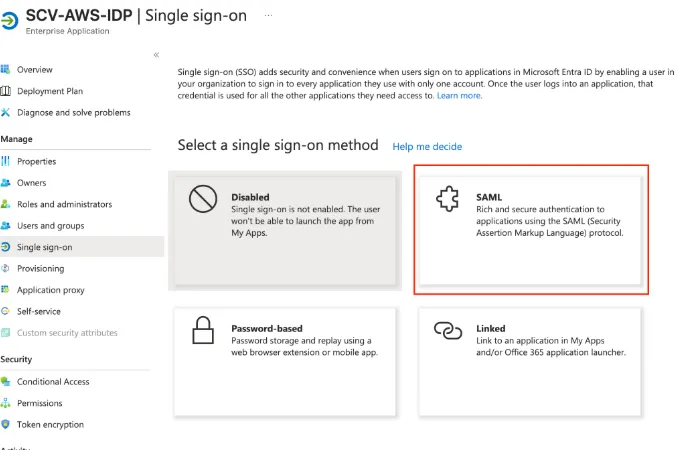
- Admin→ Identity→ Enterprise apps→ New Application→ Create your own application

2. Set up single sign on --> SAML(Method)
3. Do the Basic SAML Configuration
4. Attributes & Claims
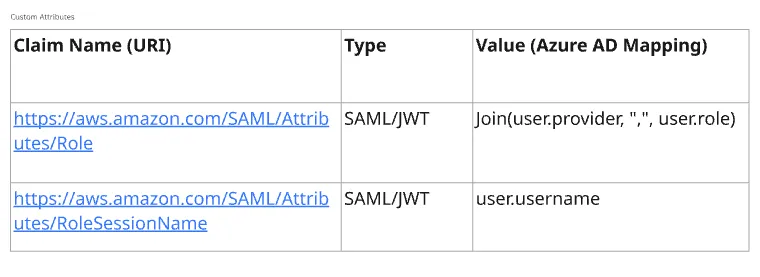
NOTE : define the 'provider', 'role', & 'username' on Users
5. Download the 'Federation Metadata XML'
6. Go to AWS Console→ IAM→ Identity providers→ Upload the Federated Metadata XML (downloaded on step 5)
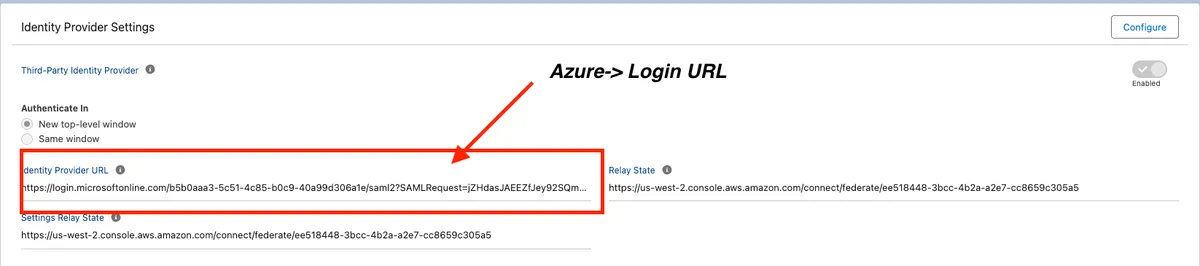
7. Take the Login Url from Azure App and update it at Salesforce side
Wrapping up
I hope this walkthrough gave you a clear picture of how Azure AD integrates with Amazon Connect and Salesforce Service Cloud Voice. The goal here was to simplify the flow so you can better understand the moving parts behind the scenes.
Go ahead and test it out, experiment with the configurations, and adapt it to your needs. With Azure AD as your IdP, you can unlock a seamless single sign-on (SSO) experience for your contact center teams while aligning with enterprise security standards.
👉 If you’d like to explore a similar setup with Okta as the identity provider, check out this detailed guide: How to Set Up Okta as a 3rd-Party IdP for Amazon Connect (From Salesforce Service Cloud Voice).
Happy building! 🚀